FoneDog スクリーンレコーダーの
FoneDog スクリーンレコーダーの
特別オファー
特別オファー


By バーノン・ロデリック, Last updated: November 23, 2021
Many people view their iPad and iPhone as travel companions. They are what keep us entertained. It may due to our favorite apps, games, and such. However, some people are fond of watching videos in MP4 format.
Unfortunately, it’s not that easy to transfer MP4 to ipad/iphone without itunes. After all, iTunes is what we usually use for these kinds of tasks, but not to worry.
This article was created to provide you with five different ways to transfer your videos in MP4 format to either iPad or iPhone without restrictions. With all this in mind, let’s start with our first entry.
Here's another example on how to transfer videos from android to iphone, if you are interested in it ,you can visit the provided article.
Part 1. How to Transfer MP4 to iPad/iPhone without iTunesPart 2. How to Transfer MP4 to iPad/iPhone with Cloud StoragePart 3. How to Transfer MP4 to iPad/iPhone by EmailPart 4. How to Transfer MP4 to iPad/iPhone with Sharing AppsPart 5. How to Transfer MP4 to iPad/iPhone via Quick Start
Since you are here to transfer MP4 to iPad/iPhone without iTunes, which is the standard tool for this job, by the way, you don’t have any choice but to use other apps or tools. In that case, it should be reasonable to use a third-party tool, and that is why I suggest FoneDog Phone Transfer.
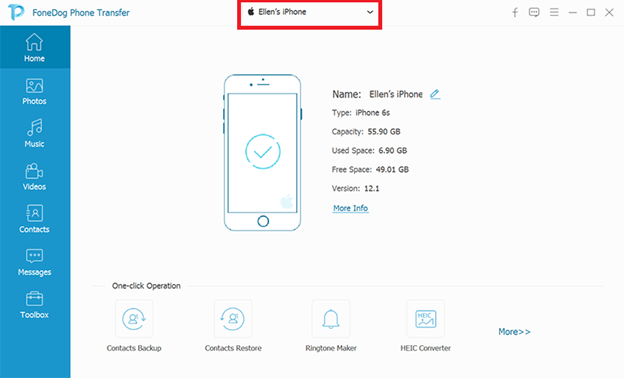
FoneDog Phone Transfer is a tool designed to help users transfer all kinds of files to and from Android or iOS, or even desktop such as Windows PC or Mac. Additionally, it supports the transfer of MP4 files, or in short, any file that falls in the video category. Simply put, it is the best tool for the job. Follow these steps to transfer MP4 to iPad/iPhone without iTunes.
Connect your iPad/iPhone to the computer using the cable that came along with the phone. Make sure FoneDog Phone Transfer is already open before doing this. At the top of the window, click on the menu then select your computer. That way, the files on your computer will be shown instead of that of your iOS device.
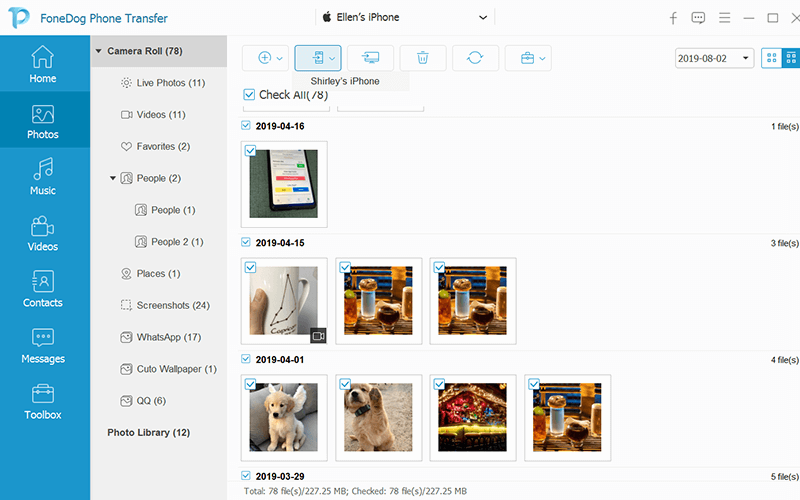
On the left panel of the window, there will be a list of file types. Select Videos since we will be transferring MP4 files which should fall in the video category. This will scan the computer for video files, including MP4.
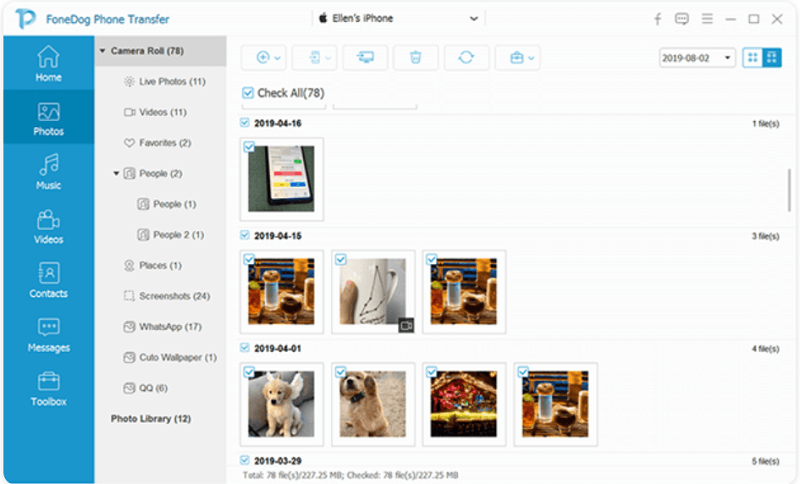
On the next interface, you will be shown a list of items which should be the files that you can transfer. Simply select the files to transfer by clicking on their respective boxes. Then, click the second button from the menu at the top to complete the transfer. Wait for the process to complete.
That’s pretty much how you can transfer MP4 to iPad/iPhone without iTunes using FoneDog Phone Transfer. The main advantage of this method is that it is simple and easy to do.
Although the best method right now is to directly transfer MP4 to iPad/iPhone without iTunes, there are roundabout ways to do it. Compared to our previous method, it is more complicated and requires more steps. However, there are perks.
Using cloud storage to transfer your files can also serve as a way to store and secure your files. Since it is connected to the cloud, it can be accessed regardless of the platform or device.
Additionally, since it is built for storing files, it allows large files like MP4. Although I won’t be going through all cloud apps out there, I have three recommendations for you.
My first suggestion is Dropbox. You may have already heard of this cloud storage app. Not only is it available on your mobile device, but it also has a desktop app. It offers 2GB of storage space for free but can be upgraded with premium accounts. Either way, here’s how you can use it:
Note: You can install the Dropbox app on your iPad/iPhone from the Play Store. You may also head to the Dropbox.com website.
Note: Files will prompt you to select the file/s to transfer. The folder will prompt you to choose the folder and it will upload all the files contained within it.
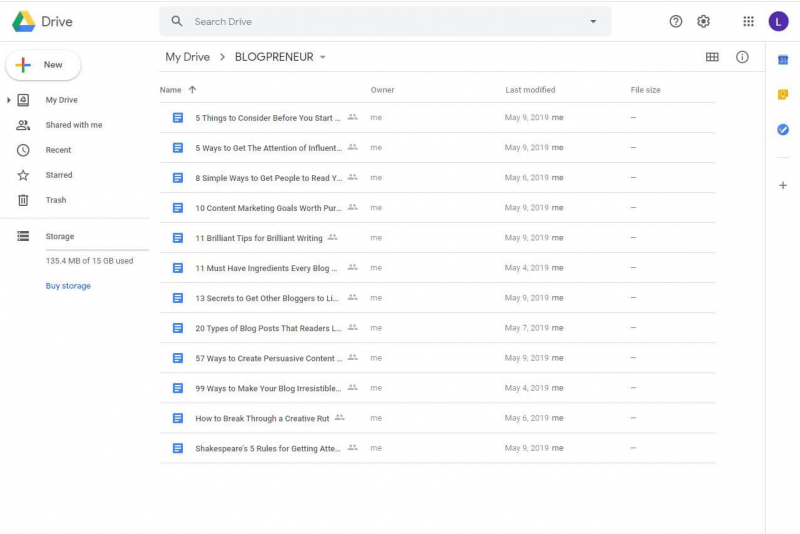
Google Drive is a bit different from Dropbox in the way that it offers 15 GB of storage space. It is a bit more generous, and there is no size limit for individual files. However, the two are similar as well since they have a desktop and mobile versions of the app. Follow these steps to use Google Drive:
Note: You can install the Google Drive app on your device, though some devices should have Google Drive pre-installed. You may also visit the Google Drive website.
Our last entry is OneDrive, the storage product of Microsoft. It might not be as popular as the other two, but it is still very good. It offers 5GB free space, higher than Dropbox. It also has desktop and mobile apps. Here are the steps you need to follow:
Note: You can install the OneDrive app on your device from the Play Store. You may also visit the OneDrive website.
These are the three best cloud storage apps that I can recommend. Although some of them may have flaws, it is only natural. Just pick the one that you find suitable to help you transfer MP4 to iPad/iPhone without iTunes.
Our next set of apps is email apps. It may be weird to use these apps, but they are actually capable of helping you transfer MP4 to iPad/iPhone without iTunes.
As you already know, emails are used to transfer pieces of data to your contacts. However, those ‘contacts’ don’t necessarily need to be other people. Instead, you can send yourself an email.
Plus, these emails can have video attachments, so it supports MP4 files as well. Here are my recommendations for email apps, though I won’t be discussing how to use them as they should already be common knowledge.
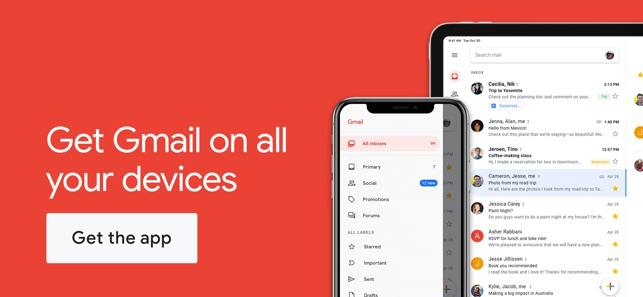
It can be said that Google has everything you need. And that’s why it’s only natural to assume that they have an email app as well, and that would be Gmail.
It is available on desktop, Android, and iOS. On top of that, it supports the sending of emails with multiple video attachments. So, you can consider Gmail to be the perfect app for this job.
However, remember that they have a size limit so you might want to hold back in sending emails with lots of video attachments since it’s likely that it won’t be sent or you will receive an error.
The outlook is another email app that is owned by a giant company that is Windows. It pretty much does everything you can do with Gmail, though the size limit for each email will vary.
It is available for the same devices that Gmail supports. That’s one similarity they have. But the selling point of Outlook which is perhaps not present in most email apps is the Focused Inbox, though it doesn’t have much to do with transferring MP4 files.
What might be helpful is the fact that it is connected to Dropbox, so you may be able to double the success chance of file transfer when using it along with Dropbox.
The last entry is Edison Mail, which is not exactly the most popular app you can find. However, it’s good enough to make it to this list.
It doesn’t have much to offer as a distinguishing factor, but the fact that you can transfer MP4 to iPad/iPhone without iTunes using this app is still enough.
We’ve discussed cloud apps, email apps, and now we have sharing apps. This is perhaps the most direct method that you can take, second to the FoneDog Phone Transfer tool we discussed earlier.
It allows you to transfer MP4 to iPad/iPhone without iTunes directly through the app. You only have to install the app on both devices and just follow the instructions. Unfortunately, sharing apps that support Android and iOS at the same time is very few. With that said, here are my three recommendations for you.
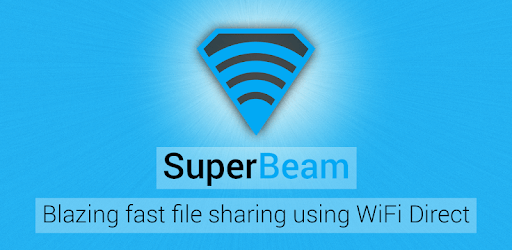
SuperBeam allows both Android and iOS users to transfer files through a Wi-Fi network. That being the case, you don’t have to have an internet connection. The Wi-Fi is only for the sake of connecting to the same network.
SuperBeam has the capability of sharing files through scanning the QR code or just waiting for each device to detect one another. Since it supports videos, you can expect to be able to transfer MP4 to iPad/iPhone without iTunes with this app.
Another great sharing app is Pushbullet which is known for the feature of being able to use extensions as much as possible. With such extensions, you can maximize the potential of the app.
It is available on both mobile and desktop and it supports both iOS and Android. There’s not much to say about Pushbullet. Its sharing speed is fast. It doesn’t have many restrictions that might hinder your goal to transfer MP4 to iPad/iPhone without iTunes. Overall, it’s a decent sharing app that suits your needs.
My last recommendation is Xender. It’s similar to the two previous apps in that it is a sharing app. However, what sets apart Xender from the other apps is the fact that it can also be used as a file manager.
With that being said, you can easily manage your files; locate the MP4 files you want to get and the likes. It is available on desktop, iOS, and Android and it makes use of Wi-Fi local networks, just like Superbeam.
In addition to the aforementioned apps, there is actually one other feature that will allow you to transfer MP4 to iPad/iPhone without iTunes, and that would be QuickStart.
Quick Start is a feature on iOS devices that allows users to quickly transfer the existing data into another iOS device. In short, it is a way for users to switch from one iOS device to another.
That said, you can expect that this method is only for transferring from an iOS device to another iOS device. Additionally, so far it only works for devices with iOS 11 or higher. Here’s how you can use Quick Start:
With that, you have now successfully learned how to transfer MP4 to iPad/iPhone without iTunes using QuickStart. It may be a bit overwhelming at first, but since there are instructions, it should be fine.
People Also ReadHow to Transfer Videos from PC to iPhone without iTunesHow to Transfer Music from iPhone to Computer without iTunes
There are different methods of transferring files, but it gets harder and harder the larger the file is. That is why it is fairly difficult to manage MP4 files since they have a considerable size. Fortunately, even with the difficulty, there are tools and apps that are capable of helping you with that.
This article provided you with five ways to transfer MP4 to iPad/iPhone without iTunes. Some of them may not suit your situation, but there should at least be an option that suits your preferences. Either way, remember to be careful when transferring files to avoid data loss.
コメント
コメント

PCの技術的専門知識/Webサイトの最適化
私の情熱の1つは、独自のソフトウェアを開発することです。
私はITテクノロジーに関する知識と、自分のソフトウェアを開発した経験を共有するために記事を書いています。自分のソフトウェアを開発することは、私の仕事への情熱の1つです。
人気記事
 /
/
面白いDULL
/
SIMPLE難しい
ありがとうございました! ここにあなたの選択があります:
Excellent
評価: 4.6 / 5 (に基づく 92 評価数)